This Pattern is from Burda Style 3/2008 (Germany), Nr.:115. But actually i changed it a lot. My dress doesn´t have sleeves and i cut the back piece on the fold, so mine doesn´t have as much flare as the pattern. But i like, how it turned out.
I found this millefleur fabric online, i think it´s from driessenstoffen.nl , but i don´t know if they still have this fabric. I do like this fabric, but i´m not sure if it´s 100% cotton.
*Dieses Schnittmuster stammt aus Burda Style 3/2008 (Deutschland), Nr.:115. Aber eigentlich habe ich es sehr verändert. Mein Kleid hat keine Ärmel und ich habe das Rückenteil in Bug geschnitten, so dass mein Kleid nicht so ausgestellt ist wie im Schnittmuster. Aber es gefällt mir, wie es sich entwickelt hat.
Ich habe diesen Millefleur-Stoff online gefunden, ich glaube, er stammt von driessenstoffen.nl (link oben), aber ich weiß nicht, ob er noch erhältlich ist. Ich mag diesen Stoff, aber ich bin mir nicht sicher, ob es 100% Baumwolle ist.

After i washed the fabric per hand, it first seemed that the background colour was slightly changed, but when it dried the colour was back to its origianal off-white. The fabric also bled out a bit, but that is normal with most cottons, so it didn´t worry me.
Then I cut the front and back pieces out.
*Nachdem ich den Stoff per Hand gewaschen hatte, schien es, als ob sich die Hintergrundfarbe leicht geändert hatte, aber als er wieder trocken war, war die Farbe wieder im ursprünglichen Weiß. Der Stoff blutete auch etwas aus, aber das ist bei den meisten Baumwollstoffen normal, also machte mir das nichts aus.
Dann schnitt ich die Vorder- und Rückenteile aus.


In this pattern, there are six darts in the front and six in the back. So twelve darts to sew…yay. I marked them with french chalk and black thread. The black thread in the corners of the darts makes it easier to transfer everything to the other side of the cut pieces. You could use copy paper for tailors as well, for that you need a tracing wheel.
*In diesem Muster befinden sich sechs Abnäher vorne und sechs hinten. Also zwölf Abnäher zum Nähen … yay. Ich habe sie mit Schneiderkreide und schwarzem Faden markiert. Der schwarze Faden in den Ecken der Abnäher macht es einfacher, alles auf die andere Seite der ausgeschnittenen Teile zu übertragen. Sie können auch Kopierpapier für Schneider verwenden, dafür benötigen Sie ein Kopierrad.

After that the darts got sewn and ironed to the side seams.
*Danach wurden die Abnäher genäht und in Richtung der Seitenähte gebügelt.


The front seam got sewn to the marking where the neckline begins.
*Die vordere Naht wurde bis zur Markierung genäht, an der der Halsausschnitt beginnt.

The next step were the pleats at the neckline. I pinned them down, secured them with some stitches near the cutting line, ironed them flat and in the right direction (the should show to the neckline) and sewed them down.
*Der nächste Schritt waren die Falten am Halsausschnitt. Ich steckte sie fest, befestigte sie mit einigen Stichen in der Nähe der Schnittlinie, bügelte sie flach und in die richtige Richtung (sie sollten zum ausschnitt zeigen) und nähte sie zusammen.


After that i closed the shoulder and side seams and installed the zipper.
*Danach habe ich die Schulter- und Seitennähte geschlossen und den Reißverschluss installiert.


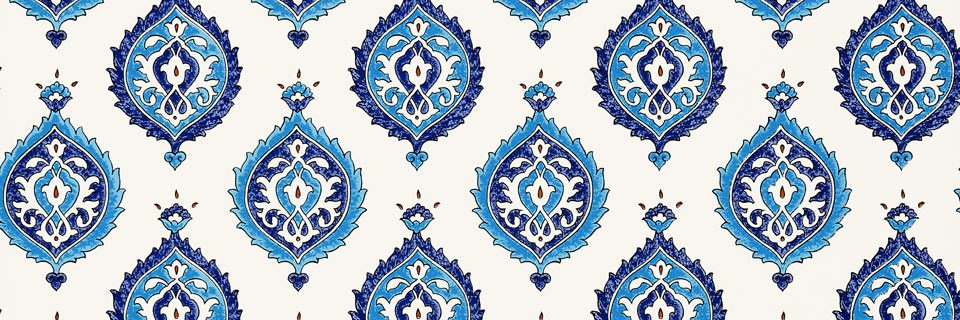
And then came the most time consuming aspect of this dress. Well it wouldn´t have been time consuming, if i just used some white (bought) bias-tape. NO! I wanted some homemade, from the same fabric. All in all, i needed about two hours for this. But it could have been worse. If you look closer at the picture of the fabric (Pic 1), you can see there are diagonal lines…lucky me! I made the stripes 3 cm wide. About 0,5 cm to bend over. It´s better to cut the stripes a bit wider, because sometimes the width seems to disappear surprisingly.
*Und dann kam der zeitaufwändigste Aspekt dieses Kleides. Nun, es wäre nicht zeitaufwendig gewesen, wenn ich nur weißes (gekauftes) Schrägband verwendet hätte. NEIN! Ich wollte etwas Hausgemachtes, aus demselben Stoff. Alles in allem brauchte ich dafür ungefähr zwei Stunden. Aber es hätte schlimmer kommen können. Wenn man sich das Bild des Stoffes genauer ansieht (Abb. 1), kann man diagonale Linien erkennen … zum Glück! Ich habe die Streifen 3 cm breit gemacht. Ca. 0,5 cm zum umfalten. Es ist besser, die Streifen etwas breiter zu schneiden, da die Breite manchmal überraschenderweise zu verschwinden scheint.


One of the most important steps of making bias tape, is to take every single stripe, mark the 45° angle and cut the rest away. It makes sewing them together so much easier.
*Einer der wichtigsten Schritte bei der Herstellung eines Schrägbandes besteht darin, jeden einzelnen Streifen zu nehmen, den 45 ° -Winkel zu markieren und den Rest wegzuschneiden. Es macht das Zusammennähen so viel einfacher.


After that the sewing began, which was a lot faster than cutting the stripes.
*Danach begann das Nähen, was viel schneller als das Schneiden der Streifen war.


Then the bias tape got ironed.
*Dann wurde das Schrägband gebügelt.


One of the last steps was binding the armoles and the neckline. I have to admit, due to my impatience to finish the dress, i made some stupid mistakes. I wanted that the bias tape was visible at the armholes and part of the neckline. Well i should have made all parts of the neckline visible, because now i have to handstitch the bias tape. Which is a bit difficult with this fabric (too thin and too tightly woven). On the side of the zipper you can really notice the closure of the bias tape, which isn´t a great handling. And on one side of the neckline i forgot to make a closure. I just cut the bias tape off, and right after i did this, i thought “FUCK!”. My solution was to handstitch around the edge. But well, the button will hide this mistake. Oh, and i still don´t know which button i should use.
*Einer der letzten Schritte war das Fertigen der Armlöcher und des Halsausschnitts. Ich muss zugeben, dass ich aufgrund meiner Ungeduld, das Kleid zu beenden, einige dumme Fehler gemacht habe. Ich wollte, dass das Schrägband an den Armlöchern und an einem Teil des Halsausschnitts sichtbar ist. Nun, ich hätte alle Teile des Halsausschnittes sichtbar machen sollen, weil ich jetzt das Schrägband von Hand nähen muss. Was bei diesem Stoff etwas schwierig ist (zu dünn und zu eng gewebt). Auf der Seite des Reißverschlusses kann man wirklich den Verschluss des Schrägbandes bemerken, was kein gutes Handling ist. Und auf einer Seite des Halsausschnittes habe ich vergessen, einen Verschluss zu machen. Ich hatte gerade das Schrägband abgeschnitten und gleich nachdem ich das getan habe, dachte ich “FUCK!”. Meine Lösung bestand darin, den Rand mit der Hand zu nähen. Aber gut, der Knopf wird diesen Fehler verbergen. Oh, und ich weiß immer noch nicht, welchen ich verwenden soll.


Although those mistakes make me a bit angry, i like the dress.
*Obwohl diese Fehler mich ein bisschen wütend machen, mag ich das Kleid.

Thank you for reading, and if you have any questions ask me here, or on Tumblr, or on Instagram.
Note: This is the first time i edited my pictures. What do you think better or worse as always? I know i´m not the best photographer, but i just like sewing more. I used this (free!!) site for editing: https://www.befunky.com/create/
(I´m not sponsored, i just think it is easy to handle…even for me.)
*Vielen Dank für das Lesen und wenn ihr Fragen habt, fragt mich hier, auf Tumblr oder auf Instagram.
Hinweis: Dies ist das erste Mal, dass ich meine Bilder bearbeitet habe. Was denkst du besser oder schlechter als immer? Ich weiß, dass ich nicht der beste Fotograf bin, aber ich mag es einfach, mehr zu nähen. Ich habe diese (kostenlose !!) Site zur Bearbeitung verwendet: https://www.befunky.com/create/
(Ich werde nicht gesponsert, ich denke es ist einfach zu handhaben … auch für mich.)
