
You know that sometimes i like to make a patchwork blanket. Actually they all should be quilts, but i hadn´t (yet) the nerve to sew through them. I fear that after hours of work, one wrong stitch could ruin everything. But well..i do like this work nonetheless.
After searching the net for some ideas, i found this wonderful site:
https://www.generations-quilt-patterns.com/
It is the perfect source for beginners! And i am still a beginner. (i´m not sponsored by any means, i just want to show you my find!) After looking through the site, i saw this wonderful pattern.
*Ihr wisst, dass ich manchmal gerne eine Patchwork-Decke mache. Eigentlich sollten sie alle Quilts sein, aber ich hatte (noch) nicht die Nerven, durch sie durch zu nähen. Ich fürchte, nach Stunden der Arbeit könnte ein falscher Stich alles ruinieren. Aber gut..ich mag diese Arbeit trotzdem.
Nachdem ich das Internet nach einigen Ideen durchsucht hatte, fand ich diese wunderbare Seite:
https://www.generations-quilt-patterns.com/ (link oben)
Es ist die perfekte Quelle für Anfänger! Und ich bin noch ein Anfänger. (Ich werde auf keinen Fall gesponsert, ich möchte euch nur meinen Fund zeigen!) Nachdem ich die Seite durchgesehen hatte, sah ich dieses wunderbare Muster.


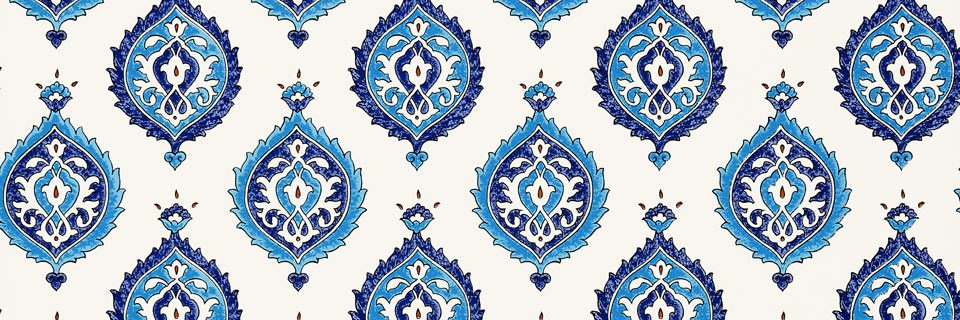
It is called Jacobs Ladder and is one of the various pattern possibilities. (Here is the Link.)
Here you can see that one block consists of two half square triangles and two four patch units. I´ll also make the one you can see first on the linked site. They are all just amazing.
Afterwards i printed the two quilt pattern and did some math.
*Dieses heißt Jakobsleiter und ist eine der verschiedenen Mustermöglichkeiten. (Hier ist der Link.)(link oben)
Hier seht ihr, dass ein Block aus zwei Half Square Triangles und zwei Four Patch-Units besteht. Ich werde auch den machen, den ihr zuerst auf der verlinkten Seite sehen könnt. Sie sind alle einfach unglaublich.
Danach druckte ich die beiden Quilt-Muster und rechnete etwas.

You need two colours. I took also white and blue. Then you have to count how many blocks there are horizontal and vertical. Multiply these numbers and you know how many blocks this pattern has. (9*7=63). We know that one block consists out of two half square triangles and two four patch units. 63 blocks * 2 half square triangles = 126 half square triangles. (From now i will use HST.) The same with the FPU=Four patch units. So there are 126 HST and 126 FPU. One HST and FPU consists of one half of a square. That means for 126 HST and FPU you need 63 suares in white and blue each. All in all you have to cut 126 blue squares and 126 white squares.
(oh Boy, i hope it is somehow understandable.)
I wanted the finished HST (and FPU) to be 10 cm. For sewing the squares and the blocks you need 1 cm seam allowance individually. So i added 2 cm (10+2=12) That means i needed to cut 12 cm big squares from blue and white.
UPDATE: If you want to sew the FPU´s like i explained in Part Two, you need to cut out 13 cm(!) big squares.
After that i measured the width of my fabric. The blue one had 140 cm width and the white one 80 cm width. Now to calculate how many squares i can cut from the width.
140cm (fabric width) / 12cm (squares+seam allowance) =11,6. I rounded the 11,6 down to 11.
Then you know how many squares of blue you need in total (126).
126 (blue squares in total) / 11cm (how manysquares you can get from one width strip) = 11,45. I rounded it up two 12. That means you need 12 strips with the width of 140cm.
How much fabric do you need? Just multiply the number of strips (12) with the size of one square (12). 12*12=144cm (it is always better to cut a bit more).
The same procedure with the white fabric which is 80 wide.
80/12=6,6. Round down 6.
126/6= 21
21*12= 252cm
Math isn´t that bad, but i will see at theend if i calculated right. So if you wnt to sew this quilt with my numbers, please wait till i finished the top!
*Du brauchst zwei Farben. Ich habe auch Weiß und Blau genommen. Dann müsst ihr zählen, wie viele Blöcke horizontal und vertikal es gibt. Multipliziert diese Zahlen und ihr wisst, wie viele Blöcke dieses Muster hat. (9 * 7 = 63). Wir wissen, dass ein Block aus zwei Half Square Triangles und zwei Four-Patch Units besteht. 63 Blöcke * 2 Half Square Triangles = 126 Half Square Triangles. (Ab jetzt werde ich sie HST nennen.) Dasselbe gilt für die FPU = Four Patch Units. Es gibt also 126 HST und 126 FPU. Ein HST und ein FPU bestehen aus einem halben Quadrat. Für 126 HST und FPU benötigt ihr also jeweils 63 Quadrate in Weiß und Blau. Insgesamt müsst ihr 126 blaue und 126 weiße Quadrate schneiden.
(oh Junge, ich hoffe es ist irgendwie verständlich.)
Ich wollte, dass die fertigen HST (und FPU) 10 cm groß sind. Für das Nähen der Quadrate und der Blöcke benötigt man jeweils 1 cm Nahtzugabe. Ich fügte also 2 cm hinzu (10 + 2 = 12). Das heißt, ich muss 12 cm große Quadrate aus Blau und Weiß schneiden.
UPDATE: Wenn Sie die FPUs ,wie in Teil 2 beschrieben, nähen möchten, müsst ihr 13 cm große Quadrate (!) ausschneiden.
Danach habe ich die Breite meines Stoffes gemessen. Der blaue hatte eine Breite von 140 cm und der weiße eine Breite von 80 cm. Nun ist zu berechnen, wie viele Quadrate ich aus der Breite schneiden kann.
140 cm (Stoffbreite) / 12 cm (Quadrate + Nahtzugabe) = 11,6. Ich habe die 11,6 auf 11 abgerundet.
Dann wisst Ihr, wie viele blaue Quadrate Sie insgesamt benötigen (126).
126 ( blaue Quadrate insgesamt ) / 11 cm ( wie viele Quadrate ihr aus einem Streifen der Breite erhalten könnt) = 11,45. Ich habe es auf zwei 12 gerundet. Das heißt, Sie benötigen 12 Streifen mit einer Breite von 140 cm.
Wie viel Stoff brauchst du? Multipliziere einfach die Anzahl der Streifen (12) mit der Größe eines Quadrats (12). 12 * 12 = 144 cm (es ist immer besser, etwas mehr zu schneiden).
Dasselbe Verfahren mit dem weißen Stoff, der 80 cm breit ist.
80/12 = 6,6. 6 abrunden
126/6 = 21
21 * 12 = 252 cm
Mathe ist nicht so schlimm, aber ich werde am Ende sehen, wenn ich richtig gerechnet habe. Wenn ihr also diese Decke mit meinen Zahlen nähen wollt, wartet bitte, bis ich das Top fertiggestellt habe!

After cutting out (and counting everything), i started with the HST´s.
Count 63 square from the blue and the white.
Take a blue square and place a white square above it. (If you have fabrics with a right and left side, place them that the right sides are facing each other.)
*Nach dem Ausschneiden (und Zählen) habe ich mit den HST´s angefangen.
Zähle 63 Quadrat von Blau und Weiß.
Nehmt ein blaues Quadrat und platziert ein weißes Quadrat darüber. (Wenn ihr Stoffe mit einer rechten und linken Seite haben, platziert sie so, dass die rechten Seiten aufeinander liegen.)


Mark a line through the square with a pencil.
*Markiert eine Linie durch das Quadrat mit einem Bleistift.

Stitch a half cm away from the line twice.
*Näht zweimal einen halben cm von der Linie entfernt.


Make sure that your helper protects your fabric for this project.
*Stellen Sie sicher, dass Ihr Helfer Ihren Stoff für dieses Projekt schützt.

Cut all squares in half.
*Schneiden Sie alle Quadrate in zwei Hälften.

After this, iron the triangles open, now you have a square again. Make sure to iron the seam allowance in the direction of the darker fabric. The final step is to cut away the “ears”.
*Danach bügelt die Dreiecke auseinander, jetzt habt ihr wieder ein Quadrat. Stellt sicher, dass ihr die Nahtzugabe in Richtung des dunkleren Stoffs bügelt. Der letzte Schritt ist, die “Ohren” wegzuschneiden.

The next blog post will be about the Four patch units and maybe the main constructing of the top.
Thanks for reading!
*Der nächste Blogbeitrag befasst sich mit den Four Patch-Units und möglicherweise dem Zusammennähen des Tops.
Danke fürs Lesen!

One thought on “Jacobs Ladder Part I (Jakobsleiter Teil I)”