Winter Knitting….and more

I know i didn´t post in a long time, but those last two months have been a bit stressful. First of all, one of my cats had an huge accident. We still don´t know what happened exactly, but somebody drove over her with a car…
There have been a lot of days of worrying, that she might die and the caring and recovery took some weeks, BUT she is alive and well, thankfully. Weirdly in those times you met a lot of people, who say instead of paying for an operation you should have put her to sleep, because “there are so many cats around”. Mildly put, i´m disgusted by those comments and views. For me, my pets are part of my family and i have to care for them.

Secondly, it is autumn now, and we have a lot of pear and apple trees, which fruits want to be harvested. And the garden needs to be in order before winter comes around…there is/was a lot to do. I was still able to knit and sew some things, but i had hardly any time to write about it (nor had i a lot of motivation to do so.)

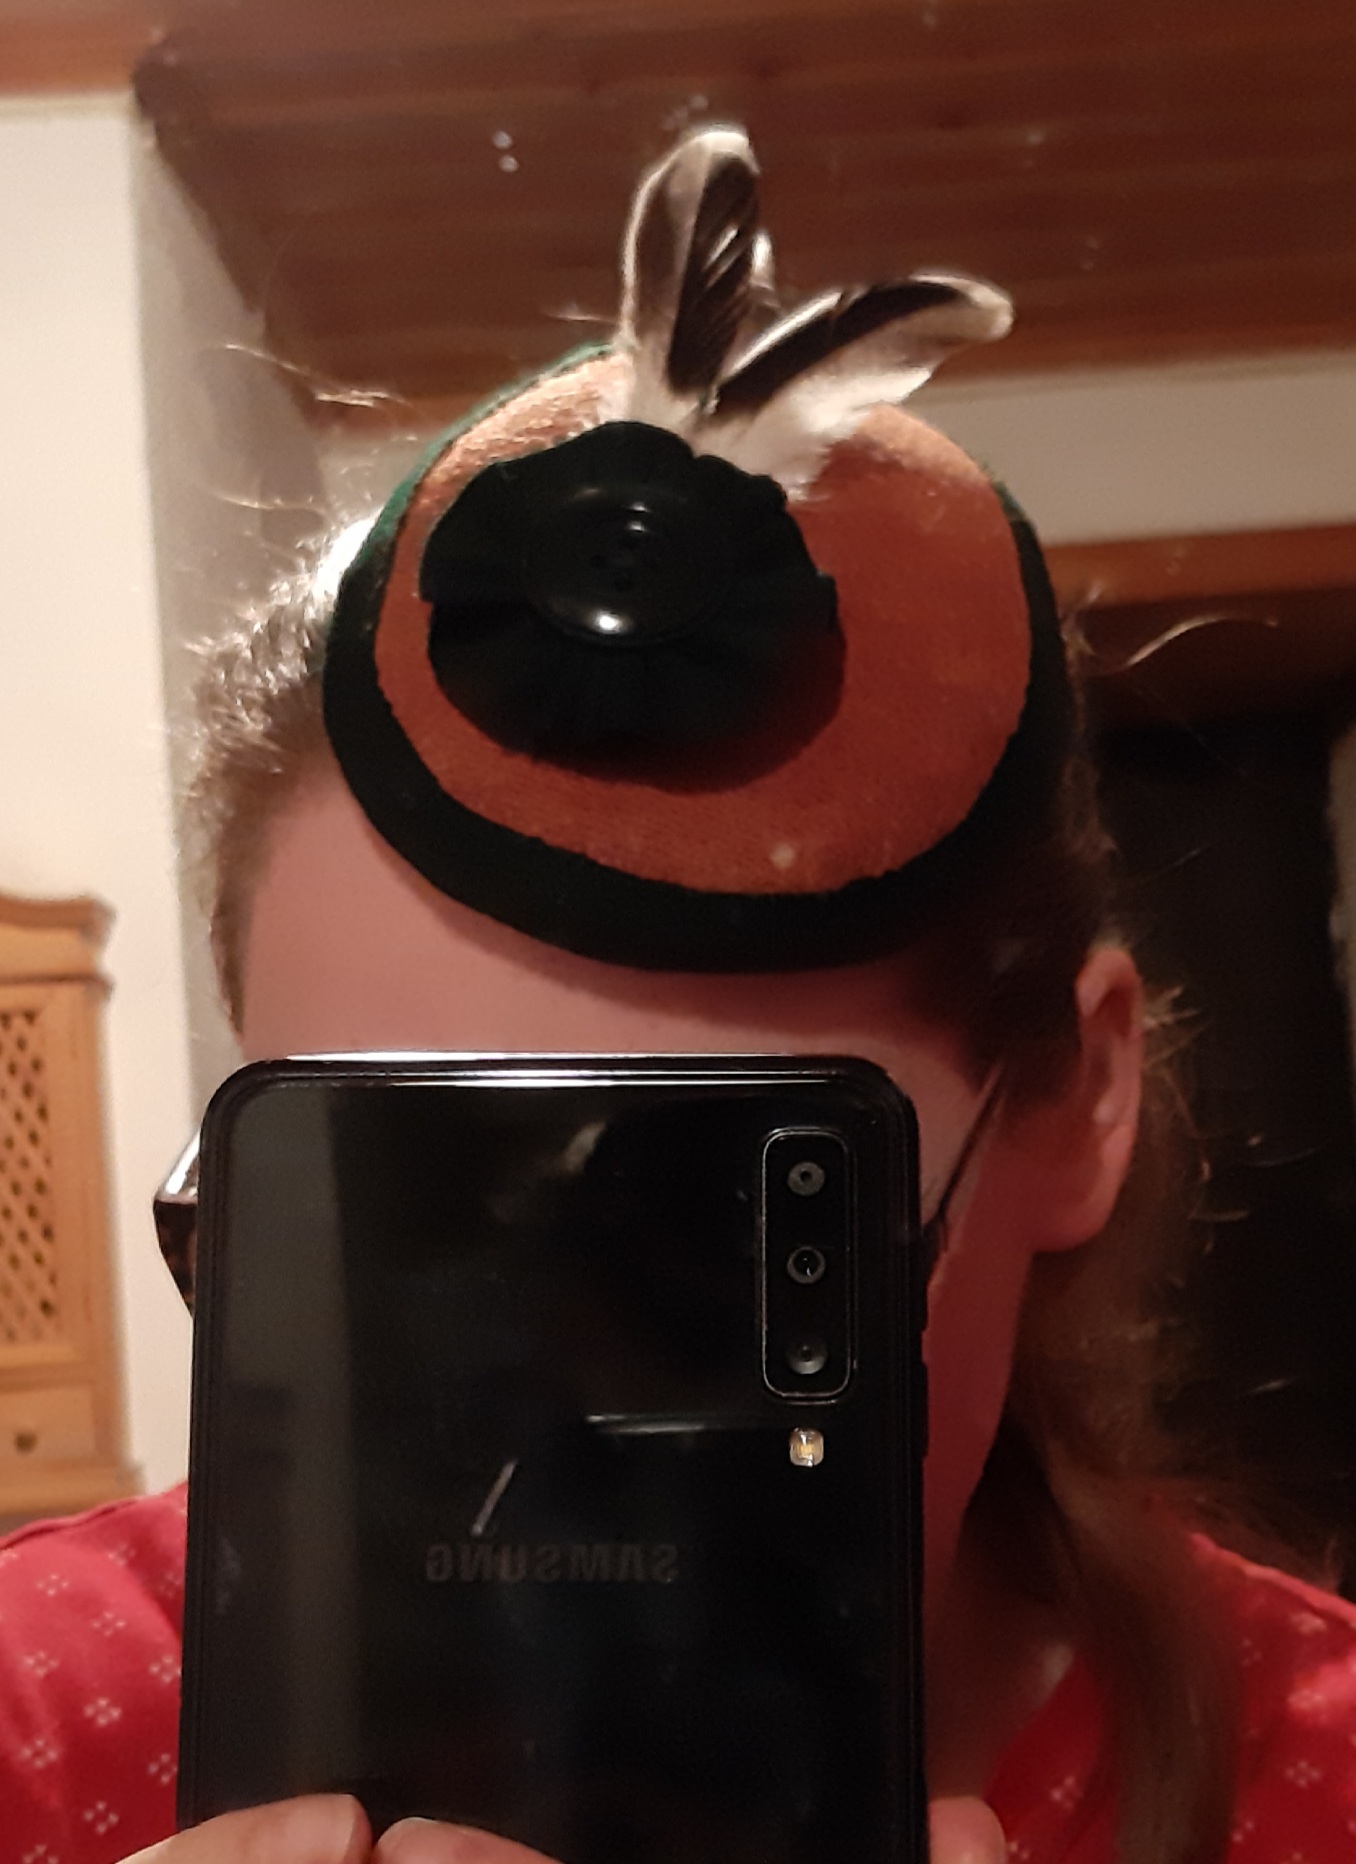
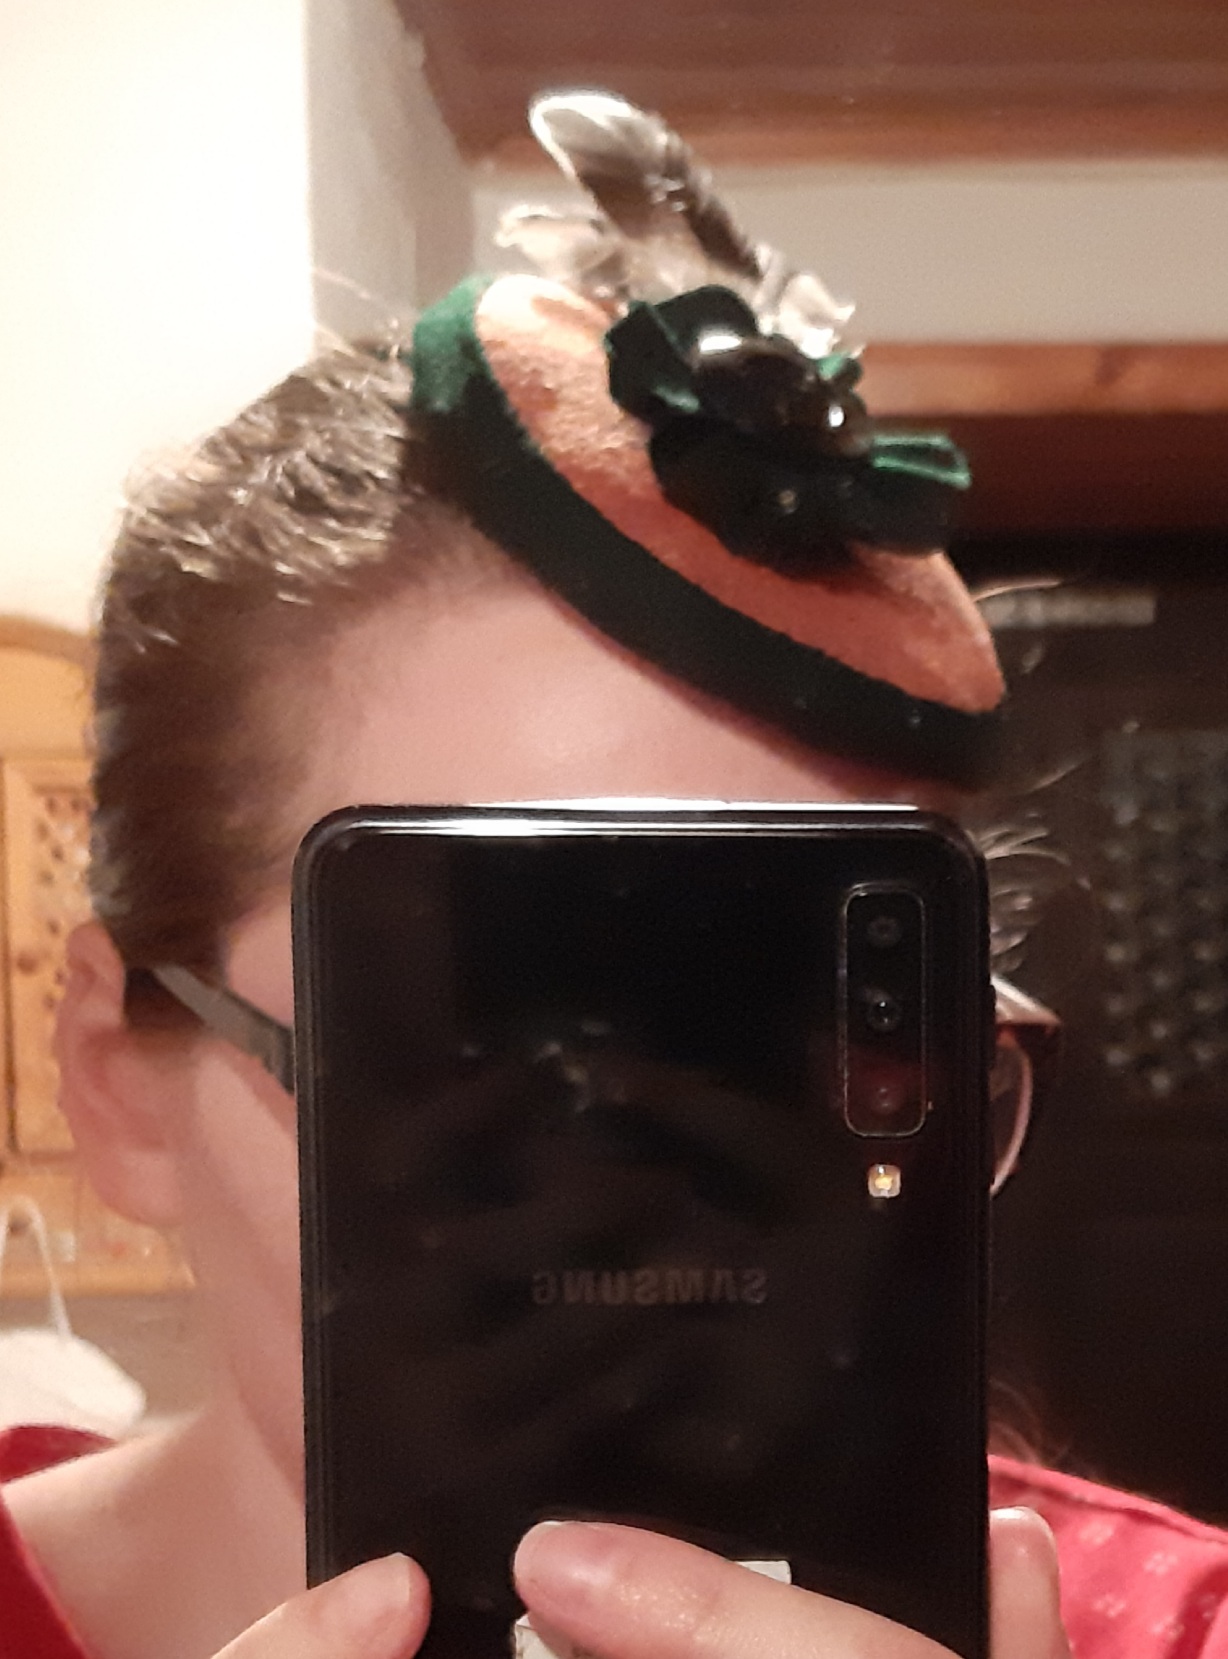
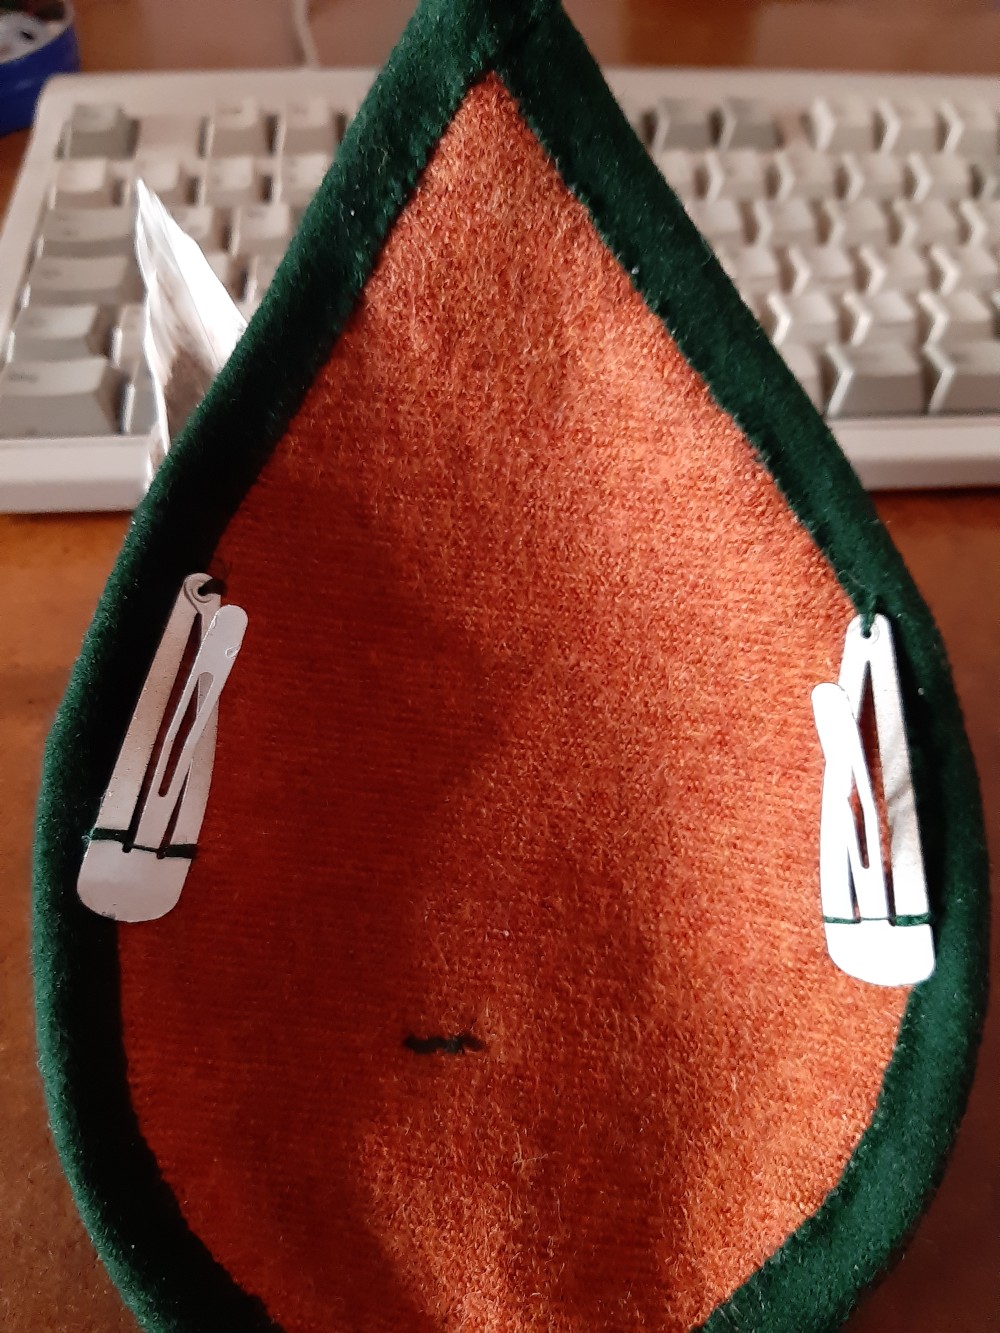
After finishing some big birthday knit for my mother (someday i will post about it), i started knitting for winter season. I needed some cozy hat, a cowl and some new mittens or fingerless gloves. I already finished the hat (i´m not quite sure about it) and the cowl, which i really like.

I had this yarn in my stash, which i bought last year i think. It is called “Schnellstrickgarn Mia” and it is from KiK. It is on the cheaper side and it is not as soft as some of the modern acrylics i have worked with before, but not as bad as they used to be. Because of the stitches given on the banderole you need for 10 cm (22 sts x 30 rows), I would categorize it as DK weight yarn and this point is one of the things i´m still a bit annoyed(?) with in knitting. It is a tiny bit thicker as most DK weight yarns i have used, but it is not actually a “real” worsted. On the other hand, i recently knitted with a yarn from Schachenmayr, which was thinner than this one, but with 19 sts x 26 rows, i would have categorized it as worsted weight. So confusing!

Well, but back to my main point. I thought it would be nice for a hat. So i chose an easy project, the “Three by Three Hat by Galzanne Knits. (Which is free on Ravelry : https://www.ravelry.com/patterns/library/three-by-three-hat)
And it was an easy project! It only took me a few hours distributed over two days to start and finish it. But i´m not sure with the end result. Because the yarn is a bit thicker than DK, the hat got a bit more voluminous than i thought. I mean, it is surely warm and that is great for winter, but i don´t know if it is not too much for my head…if you know what i mean.

The Cowl, which is the Bynx Cowl by Hayley Quinn (also a free pattern), on the other hand has the perfect size for my taste. Not to tight and not to loose. It took me a few days longer than the hat, but you could easily knit it faster than me. The cable repeating is quite easy, but don´t knit when you are sleepy…of course i made one mistake while knitting the bigger cables. It is hardly noticeable, so i didn´t go back.

For the mittens/ fingerless gloves, i don´t have a pattern yet.
What are you knitting for winter? Any favourite patterns or don´t you need anything because you have enough winter knitwear or you don´t have winter at all?

Thank you for reading and i hope you have/ had a nice weekend!
Till next time.

A Study in: Disc Hat/Fascinator

Another Hat/ Fascinator experiment!
I made this hat last year, but wasn´t able to properly write about it (don´t ask why), matching a dress pattern i am working on.

One day i stumbled upon a youtube channel called SHMillinery, as the name suggest it is all about millinery. She also sells some of her hats and fascinators in her etsy shop! Go check her out, she is a genius!
Link to her Youtube Channel: https://www.youtube.com/c/SHMillinery

The video tutorial, this hat is based on, is this one: https://www.youtube.com/watch?v=ALiCx4gFU0o&t=47s

I find it a great idea to use plates, bowls and more to block your hat on. Again, i just used what i had at home. I sadly don´t have buckram or even cotton petersham ribbon…or a prober professional glue. But it worked out and looks good enough to wear.

You need:
A plate (as big as you want)
Some cottonwool or wadding
Cling film
Fabric (enough for two circles)
Firm Interfacing (I used it instead of buckram)
Textil glue ( i forgot how the glue in millinery is named)
Paint Brush
Wire (professionals use millinery wire, i used coated electric wire, nowadays i use coated or galvanized garden wire)
Bias tape (cotton petersham ribbon is used in the video)
Decoration for the hat
a hair hoop (preferably in the same/matching colour as the fabric or in metallic)
Clothespins or Hair grips
A Tray and some plastic bag to cover it
And water in a spray bottle
Gloves ( if you have sensitive skin)

First i took some cottonwool/wadding and filled the dent of the plate. In retrospect i could have used a lot more, because the hat still has a slight dent.

I wrapped the plate in cling film (front and back!). Be careful to not get so many wrinkles as i did, if the fabric is thin, you can see them and hardly get rid of them once the fabric is blocked.


I placed the plate onto a piece of leftover fabric (same as the dress i´m working on) twice and once onto a piece of interfacing and cut everything out. Make sure to add about 4cm/ 2 inches of fabric.

It doesn´t matter if it is not perfectly round!

Wrap your tray with a plastic bag ( i used a big trash bag) and start spraying your fabric circles and the interfacing circle with water. Make sure every inch is evenly wet. Then pile your circles: first layer will be the inside of your hat, then comes the interfacing to give it some structur, and the third layer will be the outside of your hat. It doesn´t matter, if your circles are a bit wonky. Mix a bit of textil glue ( i used that white, gooey stuff you get in craft stores) with water, so it gets a smoother consistency. Spread it evenly onto your fabric (it will soak trough the layers). Here i´m still not sure when enough is enough ( but you could add another layer after the hat dried).

Take your prepared plate and cover it with your layered fabrics. Try to make the surface as smooth as possible, tucking the excess fabric to the inside of the plate and pinning it down/securing it with clothespins or hair grips or whatever you have. Next time i will try wooden clothespins, because the sharp teeth of the hair grips left a bit of a marking. I was able to get rid of it with a lot of steam afterwards. I wasn´t able to get all of the wrinkles out of my hat, even with steam, but it did look better in the end…and i put some decoration onto the hat anyways.

Let everything rest and dry for one or two days (this probably depends on how much watered glue you used).
If it is dry, remove the clothespins or the hair grips and carfeully try to separate the plate and the hat. Measure the circumference of your hat, add some cm/inches for overlapping and cut a wire in the needed length. You could join the ends with a hot glue gun or wrapping around some strong thread and a knot. I´m a bit pragmatic, i just use some sticky tape…just wrapping it around the overlapped ends.

Use a zipper foot to sew the wire to the hat.
Slowly sewing it down.
Be careful not to crush your hat.

After that, you can cut off any excess fabric.

Time for the bias tape! If you have an open/ unfolded bias tape, use that. Start sewing the bias tape onto the outside of the hat, so that the seam of the wire is hidden.

Flip your hat onto the other side and firmly wrap the bias tape around it.
Flip your hat again. Get some basting thread (or any old thread) and baste the bias tape down, so that the excess of the tape on the inside is secured.
It doesn´t need to be very tidy, just a help for sewing it down. Sew it down from the outside (stitch in the ditch) and remove the basting thread.
The hat with the finished bias tape!

Now it is time for decoration. You can do whatever you want: add some ribbons, some feathers, some buttons, some felt appliques, some lace..anything is possible.
I still had some leftover satin ribbon from the dress, so i used it and i added some more circles made out of bias tape. Everthing was hand sewn!

First the bias tape! I made sure that the ends were always in the same place.
Then i added the satin ribbon.
I´ve also got some free flowers from an online haberdashery shop i like to shop from.

The last step is to add the hat to a hair hoop. I wanted the hat to sit on an angle on my head. So i put on the hoop and tried the hat on with the help of a mirror. I marked where the hat sat on the hoop on both sides and on the hat itself.
After that i cut out a rectangle of the leftover fabric, which was big enough to cover the meeting place between hat and hoop, folded the edges inward.
The hoop was glued onto the hat with textile glue and then the rectangle was glued over the hoop to secure it (and cover up some glue stains…psst).
Let it dry a few hours and you have a finished hat!

I really like how the hat looks in the end!

Thank you for reading! Let me know, if you try something similar, i would love to see your versions of this disc hat!!

If you like my content and are able to, please consider to buy me a coffee on Ko-fi! Thank you!
https://ko-fi.com/sewingforyourlife

Knitting Adventures: Subtle Diamonds-Headband (Free Pattern)

After finally finishing my Cable-Cardigan (that Blog-Post will be coming soon), i still had a ball and a bit of wool left. So i made a MissMarple Scarf (which i also will write about in a later post) and a Headband.

After knitting cables for so long, i wanted something simple, but still with a bit of texture. I decided to knit a relief pattern that looks like diamonds or rhombuses.

The pattern has 39 columns and 21 rows (with border/edge stitches). I used Soft & Easy Color from Schachenmayr, it is a Nr. 4 yarn (Medium) and 100% Acrylic (but is really soft and nice to wear). The gauge on the package band of the yarn is 19 stitches x 26 Rows = 10 x 10 cm, if you use a 4 mm needle (US 6). I used a 3,5 mm needle and i´m a rather tight knitter, so my headband ended up being about 9 cm wide (without the crocheted boarder). You can change the width of your headband with a different yarn or different needles + it always depends on how tight or loose you knit.

I can not exactly say how much gram or how many meters of yarn this headbands needs, because i used leftover yarn, but i guess it will take about 20-30 grams?

After finishing the headband, you have to block it a bit, so the pattern shows up better. I did this before crocheting the border, because i found it easier.

After repeating the pattern four times i ended up with a 52 cm long band. If your head is a bit bigger than mine, you have different options. 1.) you make a swatch before you start and calculate how many repeats you need for your head, maybe starting and ending wih the half of the pattern, or adding some simple knit rows between the diamonds.
2.) You can block it more, so it gets longer. But this, of course, has its limits. And the headband gets narrower.
3.) Make your crochet border on the two narrower edges a bit wider.

What you need:
Leftover yarn about 20-30g; 3,5 mm -4mm needle; 3mm-4mm crochet hook; 3 buttons

Pattern:
The Back rows or WS-Rows will be knitted as seen. Row number 1 will be knitted once, after that repeat row 2 to row 39 till you have your desired length.

Hint: With this pattern, you can choose which side you like most.

After you finished knitting the headband (and after blocking it), crochet around all edges once with single crochet. Finish one of the two narrow edges with another row of single crochet. Make buttonholes at the other side, for this single crochet 3, make 3 chain stitches, repeating till you have 3 stitches left, single crochet those. ( Remember to try out, if your buttons fit throught the first buttonhole, before you finish off the row! If they are bigger, add a chain stitch and omit 1 single crochet.)
End with another row single crochet on top of the buttonholes.

Mark and sew the buttons on and weave in all loose threads.
And the Headband is finished!

Thank you for reading and happy knitting!

Knitting and Sewing Plans Dec.2021

I know we are already near the middle of December, but i still have some knitting and sewing projects planned for this month (where i only started a few of them already), or at least till the 24th. I wanted to talk about them or better said “document” them, to encourage myself to complete them.

There are still two blog posts outstanding of projects i have finished, they are in my queue, waiting to be released. One post is about two headbands – there will be also a free pattern for one. And the second is another hat/ fascinator i finished in May, but wasn´t able to write a blog post about it.

Another thing i wanted to say, normally i (try to) post every week, but, as you noticed, the last months i just couldn´t. This month i see as kind of a compensation, to post as much as i can. But for 2022 i hopefully will be back to a more regular schedule.

Let´s start with the christmas gifts, i still haven´t started. This year i´m celebrating with my mother, my father and maybe my sister (it depends on the covid measures in Austria). My brother is in Vienna, so i don´t think that he will visit us.

Gift for my Mother:

I will knit the Skyline Hat pattern by Nan Schoonover for her. ( I do not put a picture below, because they don´t belong to me.) It is a free pattern on Ravelry and it looks great.

I never knitted complicated colourwork, so that will be interesting. Well, it is complicated for me, at least it looks that way. I have to look up some youtube videos about it. I already have some balls of yarn i want to use – they are all from my stash which is great. The colours will be black, anthracite and white. I need to knit a swatch to see if they work out, but i think it will be ok.

Gift for my Father:

Another hat. Yes i know, very creativ, but my family is really hard to give presents to. And i swore to myself several years ago, that i don´t give away bought presents anymore.

This will be the Rib-A-Roni pattern by Jane Tanner. I hope it is as easy as it looks, but i haven´t read the instructions yet.
It is also a free pattern. I don´t know, which yarn i will use, maybe i have enough left over from the hat for my mother.

Gift for my Sister:

For my sister i am planning a pair of socks. I thought i wouldn´t be knitting another pair this year, but well, here we go again.
The pattern will be the Snicket Socks by Sabine Riefler. I will use a self-striping yarn from Klaus Koch Kollektion.

I wanted to knit a pair of socks from them for me, because the colours remind me of Slytherin. But my sister also likes green. I hope she likes the socks as well.

Table Runners:

I´m also planning on making at least two table runners. One with christmas ornaments and one more geometrical. I have no idea from where i got those pictures, so sorry to the person one of those belongs to.

Bags:

I´m not sure if i manage to make these, but i´m in dire need of some yarn bags in various sizes. If i make my pattern myself (which will probably be the case) i will upload it as a free pattern. I just need to figure out, which shapes are the most practical.

Finishing WIP:

I want to finish my cardigan, which i started in the middle of september. The first sleeve is nearly done, so i´m on the finishing line for that.

I also have a second cardigan, which is completely knitted, but i still haven´t sewed it together. I can´t remember when i “finished” it, it must be years ago…

And i a few days ago, i started another headband, but with the same pattern from here.

I know, this is really a lot, probably i´m too overambitious, but i will try anyways.

What are you making, in those last days of this year?
Thank you for reading, and till next time!

A Study in: Teardrop-Shaped Fascinator + Free Pattern

Again i have been dipping my toes into Hatmaking/ Millinery. This time trying to make a Fascinator (Spoiler: Sucessfully!). I did some research on youtube (there are many hatmaking and millinery videos…just enter some keywords), pinterest and in general on google. I found out, that for a beginner it is not necessary to have a Block for blocking hats (mostly made out of wood), and if you like hatmaking you can make one yourself out of styropor.

You can use bowls, plates or other sturdy surfaces to “block” your hat. Most tutorials suggest that you use buckram (or any other sturdy non-fusible interfacing or very stiff but not too heavy linen – in german we would call it “Schrabackeneinlage” or “Steifleinen”), and a water soluble stiffener. You can use nearly every fabric you want – at least that is what i found out till now. Stiffeners can also be made from things you have at home like corn starch or textil glue…there are some differences in looks and end results, but that is another topic for future experiments.

I made my own teardrop-shaped Pattern, which you can download below. I used some boiled wool, some wire (the same i used in my past experiments), textil glue mixed with water as stiffener, felt tape for the edge(s), my head form for “blocking”, transparent foil/plastic wrap (?), decorations, hair clips and thread.

I started cutting out the pattern twice from the boiled wool and put some plastic wrap over my head form. I wet the two pattern pieces and mixed the glue with water to get a stiffener. My glue is a standard textil glue, but i think i made it a bit too thin. Make sure to apply the stiffener on the non-visible sides of the boiled wool. Textil glue tends to ligthen the fabric a bit (residues). I placed one wet pattern piece onto the “block” (in my case, my head form), spread half of the stiffener onto it, took the other wet pattern piece in my hand (if you are sensitive use some gloves) and spread the other half of the stiffener onto that. I carefully put the second pattern piece onto the first, pinned it at the edges and let it dry over night.

You can see, that it is indeed a bit wet. But that is okay.

I was really impressed how good the stiffener worked, because before i thought that i should have used some interfacing. The wool is still movable (i don´t know how to describe that better), but it works for a fascinator in that size. If it gets bigger, there should definitely be some interfacing between the two layers.

I hand-sewed some wire around the edges with some heavier thread and hand-sewed the green felt tape around it. I didn´t take any pitures, because i wasn´t sure that it would work out. The wire helped with shaping the fascinator a bit more, which is nice, because i can adjust it exactly to my head.

For decorations i just used some felt tape and gathered into a flower, some feathers my grandmas ducks lost last year and a green button. (Feathers are easier to sew through and on, than i thought!)

Ignore my fuzzy-head…

The pictures above were made before i added the hair clips. So, i´m only balancing the fascinator on top of my head.
I wanted to get some other hairclips, but i only could find the “usual” ones.

They are fine, but once i get my hands on something better, they will be replaced. I sewed one of them on each side. Trying the right placement of them beforehand.

And the hat was finished. All in all, it took me just a day (counting over night) to finish it. It was easier than i thought (that is a sentence i use so much, because i always think everything is complicated and work-intense).

Here you have the free Pattern. Please print it in actual size and measure the Control Box (5×5 cm). If you make something using my patterns (free or commercial) please send me pictures. I´m always interested in the creations of others. And if you have a suggestion for improvement or any other feedback, please let me know. I´m always keen on learing more and more. The Pattern is in A4-Format.

Thank you! Till next time…probably next Friday.