Knitting Project and Notion Bags…and sewing plans

I looked at my last blog posts and they were all about knitting, which is weird because i´m mainly a sewist. Well it is just that knitting, at the moment (for the last year or two), really calmed me down. But this blog is actually about sewing!
I´m working on sewing patterns, yes…but i´m in a kind of rut. I have plans and i am still making some projects, but most of the time i don´t want to take pictures of them or they take weirdly a long, long time to finish.

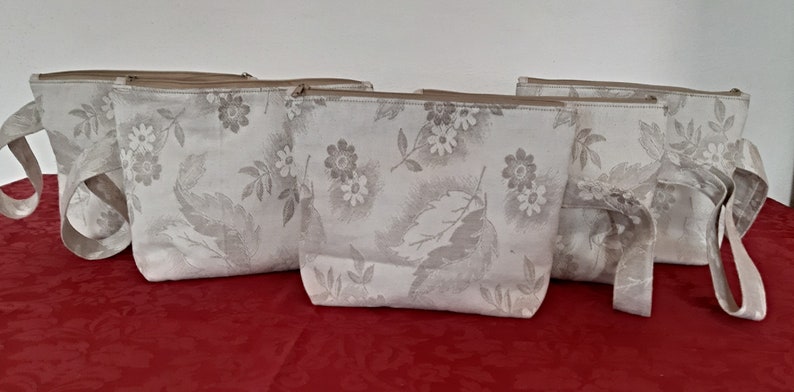
The last few months i made some Knitting Project and Notion Bags, which are available in my Etsy store. https://www.etsy.com/de/shop/SewingforyourLife
I´m planning on making some Patterns/Tutorials as an E-Book about them. And someday i will finish those E-Books and get them online.

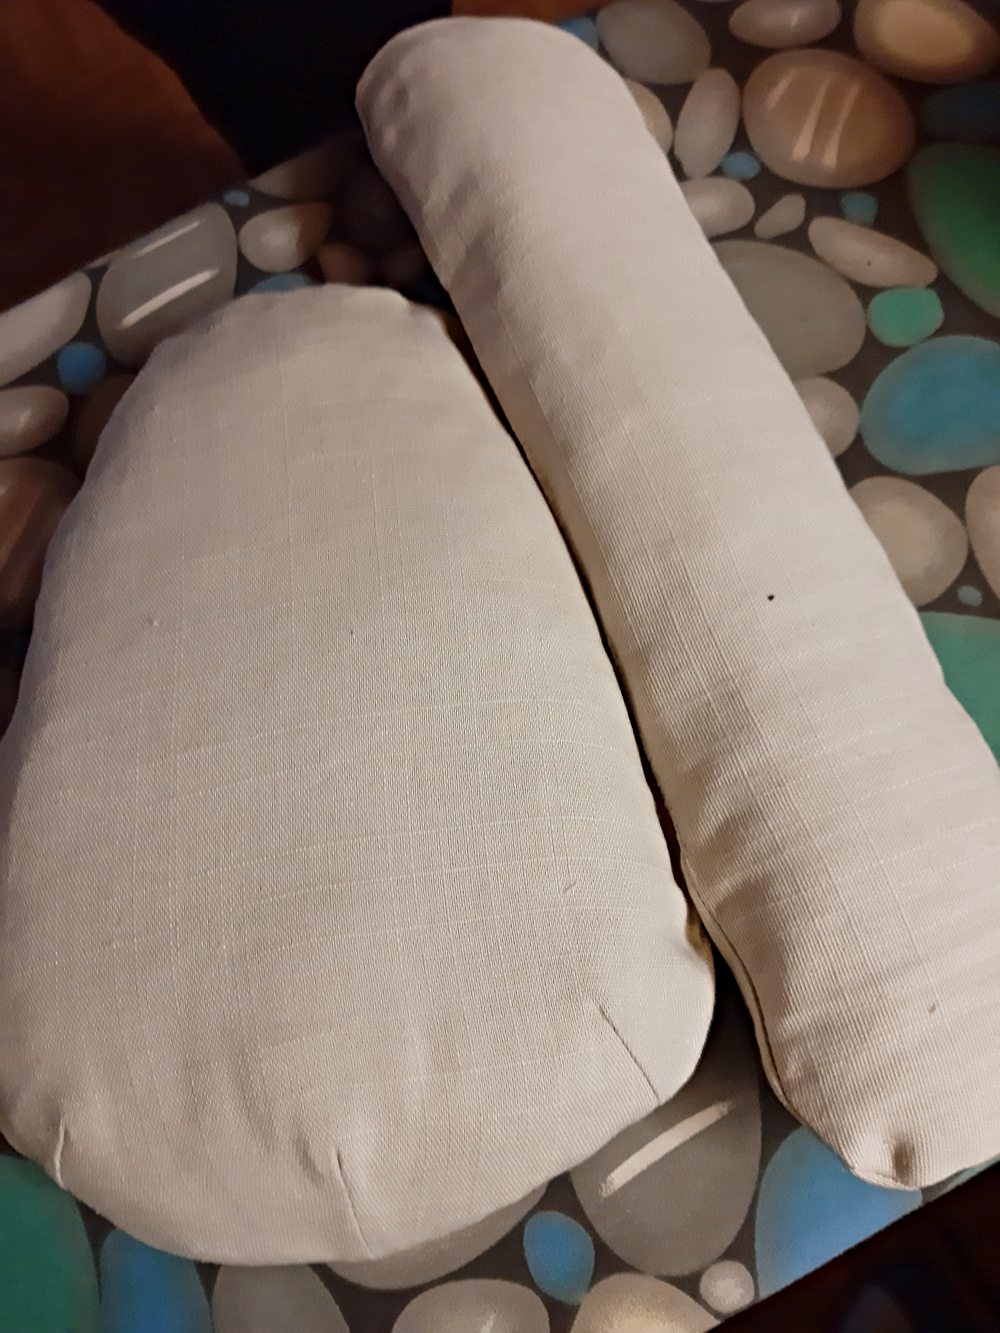
For the beginning, i have two kinds of bags. One i call semicircle bag and the other is a zipper pouch. Both come in different sizes, but not always in the same fabric, because i make my bags from upcycled material. There is so much fabric in Second Hand Stores or even leftovers when i alter curtains or other things for customers, if i wouldn´t make something useful out of it, it would be thrown away. And i think that is an absolut waste of fabric. I somethimes even use clothes like jeans or other materials.

Here are some of my semicircle bags, made out of leftovers from upholstery fabric. Available in three different sizes. The XS ones are great for notions or small crochet projects. The small ones are great for a sock project (i have my current sock project in one of those bags). The Medium have place for projects which are bigger than a sock but not big enough like a sweater or something.

Link: https://www.etsy.com/at/listing/1410695881/upcycling-bag-semicircle-upcycling

Those two are the same pattern in size XS and Medium.

Link: https://www.etsy.com/at/listing/1412839329/upcycling-bag-semicircle-upcycling

This zipper pouch comes (at the moment) in one size, in two different shades (this one is the darker beige but there is also a lighter beige in the shop) and with handles or without.

Link: https://www.etsy.com/at/listing/1422459783/upcycling-zipperpouch-with-handle-darker

Link: https://www.etsy.com/at/listing/1410684739/upcycling-zipperpouch-with-handle

Link: https://www.etsy.com/at/listing/1396462336/upcycling-zipperpouch

Now i´m working on some different sizes of the zipper pouch. (And some different fabrics). I hope i can put them online at the beginning of April.

Thank you for reading and till next time, maybe with new sewing or knitting content.

Altered Palazzo Pants

If you follow me on Tumblr (Sewingforyourlife) you know that in the last few days ( yes this blog post is actually is really currently) i sewed myself some straight legged trousers. I had some nice blue viscose in my stash, which is wonderful to survive a heat wave. I still have some leftover (about 3 meters) so there will be something else coming in the future, but i just don´t know what.

I altered my Palazzo Pants pattern (which you can get in my Etsy-Shop – and soon in my Kofi-Shop).
Link to Pattern.

I just folded away the pleat in the middle of the pattern pieces (a bit conical), measured the hip and added what was missing.
Quite easy.

Cutting the fabric wasn´t that much fun, but i managed to get some reasonably straight cutting lines.
The sewing process was similar to the Palazzo Pants, so it was literally a no brainer.

Here is my pattern and the fabric.
And the finished trousers!

Nice to wear, feels really soft on my skin and most importantly keeps you cool…i love it.

I know, it is a short blog post. But i didn´t want to take any pictures, i was more in the mood of “just sewing”.

Thanks for reading, till next time! (I still have to write a few blog post about some old projects)

2021 Review and Plans(?) for 2022

Another horrible year is ending soon…and at the moment it seems that 2022 won´t be much better. But, at least, i try not to loose my hope, it has to end someday..

Normally i´m doing a kind of “Best of Works” but this year was so different, so i will start with what i got done the last few weeks. Knitting was my main nerve-soothing medicine this year. Socks my new found love…
In my post, two weeks ago (or more), i listed a few projects i wanted to get done or planned on starting.
I knitted two hats, one as a present for my mother and one for my father, but not those pattern i originally had chosen. I thought i had the right needles to knit them…no i hadn´t, maybe i lost them or misplaced them somewhere..i don´t know. And time was running short, so i decided to make two very simple hats with different coloured stripes. 5 cm ribbing and than always 5 cm in another colour in stockinette. I made them about 20 cm long.

Of course, after i was wrapping up the presents, i remembered that i didn´t take any pictures…

I also made some changes to the socks for my sister. The yarn wasn´t perfect for the pattern, in means of good to knit. The last yarn of that brand was good to knit with (well i knitted a standard sock without any pattern), this one kinda hurt my fingers because it didn´t slide as well as other yarns. So i decided to knit only one pattern repeat, and make the rest of the sock as usual. Still a really nice sock! And the fit great!!

And again…didn´t take any picture of the finished socks.

The table runners and the bags are still on my list, but only one got started a.k.a. fabric cut out.
I started the planned headband, with the woven cable pattern i mentioned, but frogged it because i didn´t liked the colours. It looked a bit too 80´s for me. But now i know, cables give a great textured fabric, even with colourful yarn.

The finished cardigan i have to sew together is still sleeping in its tiny bag.
The cabled cardingan i´m working on has now one sleeve. I don´t know if i´m able to finish the second sleeve this year, but sewing it together will be happening in January.

Here is an old picture of the (then unfinished) back piece. I noticed a mistake in knitting and one in thinking, but more of that in a later post!

Plans for 2022:

I want to get back to sewing, which means sewing more regularly. I have some patterns drafted, which will need some pattern testing before i can release them. Mostly summery clothes, dresses.
I also have some more free pattern in my mind, which will be downloadable here on the blog.

For knitting, i have one project i´m planning (i´ve already got the yarn for it), which is this cardigan: Cable Stitch Winter Jumper by Australian Women´s Weekly. It is a free vintage pattern.

But all in all, i don´t want to make too many plans for the next year. You never know what can happen.

I wish everyone Happy Holidays and a Happy New Year. Stay safe, Stay Healthy, Stay Hopefull!

Old Block Quilt-Along by Bernina

This Blog Post won´t be a tutorial or anything similar. It is just a simple way to convince myself (or rather pressuring me) to sew the monthly Quilt-Block. I normally start those kind of things /sew alongs, and then just quit it in the middle.

If you want to join, here is the link to the bernina site (in german):
https://blog.bernina.com/de/tag/old-block-quilt-along/?filter=date

The first Block is the Bride´s Bouquet. Which was quite difficult for me, well…till now i only sewed together squares and once made HST. I am a beginner and i did notice that, while sewing.
I also have to admit, i probably used the wrong kind of fabrics. You should always use cotton…and you should always follow the instructions. I´m a stubborn human being, so for patchwork or quilting, i only use the materials i have in my leftover bin. And there is everything!

It took me quite long to decide, which colours i wanted to use, and i´m still not sure, if i like them or if they will fit all together in the end. Maybe i will sew everything again near the end of this challenge…who knows?

After cutting everything out, i arranged the pieces as the would be sewn.
(oh sorry for thath horrible picture) First i sewed the squares together and pressed them open.
After sewing, i always put the pieces back, where they belonged to. This made it really easy to stay focused.
Then i stitched the triangles toegether and pressed the seam allowance to one side.
Than it was time for the Rhombuses..till now everything went well and was rather easy…
…but the Y-Seam were quite a challenge. Some came out beautifully, and some are really ugly.

After the first Y-Seams i stitched together the rhombuses and sewed on the triangles. I think anywhere in between those steps i thought: ” Well, now i know how this works, so i don´t need to read the rest of the instructions.” Stupid me…the last two seams got all wonky. Well i tried out something new and it is not THAT bad.

Wonky, but fine.

The second Block is already online. I don´t know when i have time to sew it together, but i sure will finish it next month.
I hope you will join the Quilt-Along, the more the merrier. And don´t forget to post you blocks with the Hashtag #BERNINAOldBlockSampler .

Thank you for reading, till next time!

Free Pattern: Tailors Ham + Sausage

I´m sorry that this post is soo late, but gardening season is starting, so i had a lot of work to do.

For years now, i wanted to have a Tailors Ham and a Sausage (or some people call it seam roll). Finally i was motivated enough to make my own patterns, to cut up some leftovers for the filling and start sewing.

The sewing pattern is again at the end of this post, and free to download. I used some leftover medium weight linen, i had laying around and cut 2 layers for both. For the filling i just cut up some leftover fabrics, i had in my bin. I didn´t care, that some of them weren´t natural fibers, because i´m sure that the filling is protected enough by the two layers of linen.

I cut out the first layer with no additional seam allowance, marked and clipped in the opening (which is marked on the pattern.)

The opening for the filling is marked at one end.
It doesn´t show up, but the markings for the opening are across from the darts.

I closed the darts on the tailors ham, ironed the middle one flat and the others to the side. After that i serged the edges of the ham and the sausage.

I didn´t care about the colour of the thread, nobody will see it and the end product of this project is just functional.

With right sides facing each other, i stitched everything together with a very narrow seam allowance. Do not forget to leave the opening “open”.

Then turn the tailors ham and the sausage right sides out and stuff it with the filling. Both should be quite solid and hard, so you have a sturdy surface to iron upon.

It looks like a lot, but i used more than twice as much.
Close the opening by hand.

I first cut out the second layer with about 5 mm additional seam allowance, but in the end i had to sew it a bit smaller. I guess you would be perfectly fine with 2 mm. Then everything started from the beginning, with one little difference. This time i marked the opening at the side (as you can see on the pattern). You need the bigger opening, because you put the second layer over the fully stuffed tailors ham and sausage.

It helped me to iron the seam allowance before closing it with some handstitching. It doesn´t matter how you sew it shut.
I even changed the stitch in the middle, because i thought it would be faster. (But it took me as long as the first half)
And this is the finished tailors ham and sausage!

I hope the instruction/ explanation is clear. Basically, this project is so easy, you can´t get anything wrong and if there are some mistakes, it just doesn´t matter.

Here is the pattern to download:

Thank you and till next time!