

I needed a kind of storage box or anything for my two hats, that i made last year, so they wouldn´t get very dusty. (I don´t wear them that often…well if you remember the hats you would guess why.) Here are the links to my two hats, for those who are new here and for those who can´t remember, because it is long ago since i tried my hand at millinery…(but soon again!).
I didn´t want anything ordinary, so i searched pinterest and found a picture of a Bonnet Bag. I really liked the idea of it and made my own pattern, which than i had to improve/ change a bit…but in the end it worked out.
If you want to make a bonnet bag as well, my pattern is at the end of this blog post – free to download.
But please, i would love to see your creations, so send me pictures!
The pattern consist of the Bottom and the Side (rectangle). I drafted it for three different sizes. Size Small 33×39 cm, Size Medium 43x49cm and Size Large 53×59 cm. All Pattern pieces are without seam allowance!
The Original is from the mid-19th century and is made out of twill, a stiffened bottom with strips of wood and hoops up the sides, as well as drawstrings at the top.
Source: https://collections.mfa.org/objects/65963
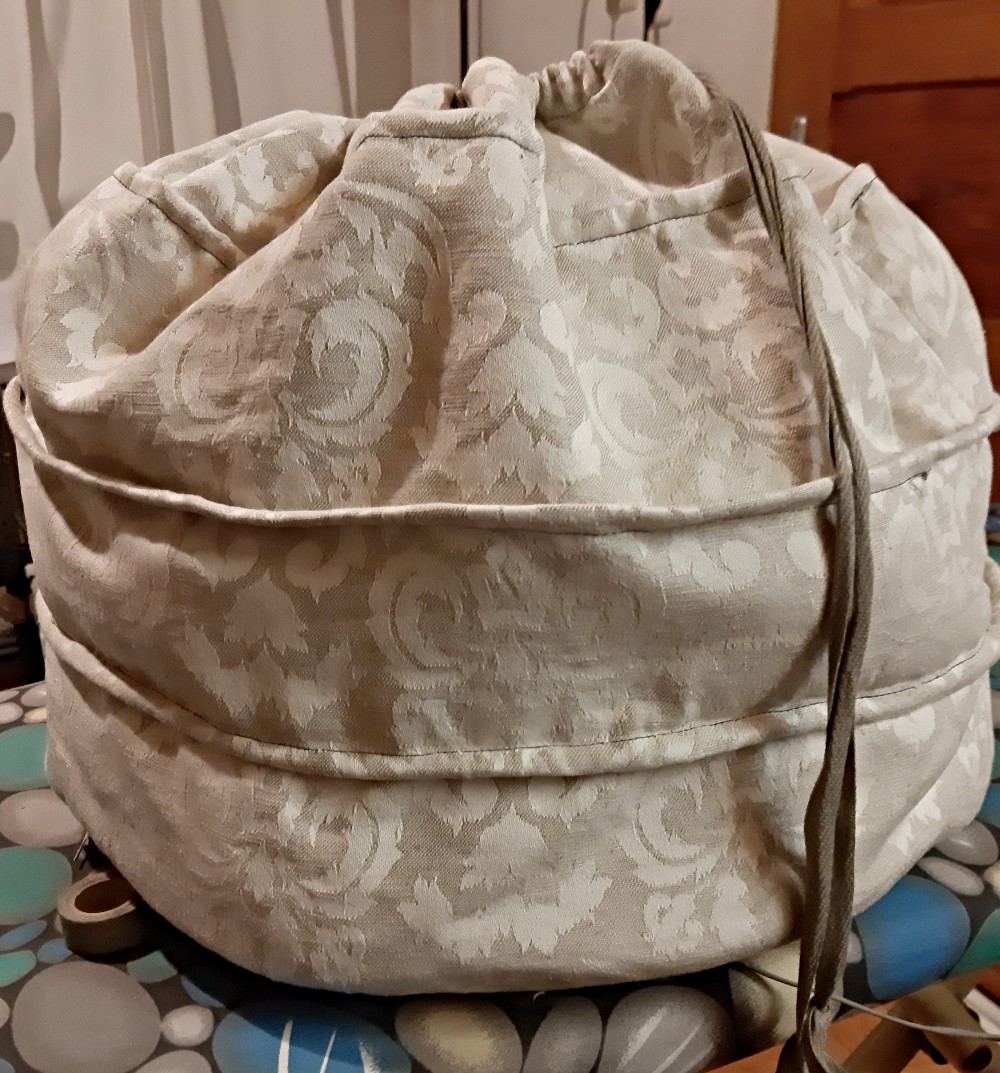
For my Bonnet Bag, i used some left-over linen jacquard i had laying around. (Which in the end proved a bit too thick for this bag, so you would be better off, if you use some light material.) Some plastic boning for the bottom, Wire for the hoops and cotton tape for the drawstring. I also finished every seam allowance with bias tape, but that is not necessary.
I planned to insert three hoops, but ended up with just two of them. I´m also planning on replacing the drawstings with something more sturdy, like a cord.
You see, there were a lot of improvements. You can only find things out, if you start and experiment.


I cut out the bottom piece twice from the fabric and twice from the interfacing i had. The stiffer the facing the stiffer will be the bottom. I only had medium weight interfacing at home, but it worked out as well.
I ironed the interfacing on the wrong side of the fabric and let it cool out.

I stiffened one of the circles even more by stitching on some boning channels onto the wrong side of the fabric (the right side will be outside) and added some boning. The tape i used here was something i found in my stash, it is normally used for the hem of mans trousers. (in german we call it: Hosenstoßband). If i find the proper english term for it, i will let you know!
Make sure that you leave the seam allowance without boning or else you can´t see the circles together properly.


After that the bottom was finished. I then cut out the rectangles aka the sides. Don´t forget to add seam allowance on every side.


After sewing everything together it is time to insert the hoops. I didn´t take pictures of mine, because they were totally McGuyver-ish. For one hoop, i cut off two strings of wire (a bit more than the circumference of the bag) and glued them together with duct tape. I also glued some duct tape onto the ends, because this makes it easier to insert the wire. After inserting them into the tunnels, i again glued them together with duct tape and closed the opening – you can do this by hand or with your sewing machine.
Normally you would use real hoop wire, but i hadn´t any and didn´t want to buy some.
As i mentioned above, i planned to have three hoop tunnels, but i realized i couldn´t close the bag properly. So i skipped it. I am able to close it better than before, but not completely. I think i should have used a thinner fabric. But well…making mistakes and learning from them.
And here is my Pattern for you, free to download. Once in A4-Format and once in Letter. Please ignore the rectangle around the Bottom Pattern Piece, i had to construct it this way or else i wouldn´t have been able to convert it to PDF. ( i hope the Files are working!)
EDIT: I was able to reduce the size of the files, so you don´t need to print too many sheets!
Thank you for reading! Till next time!
